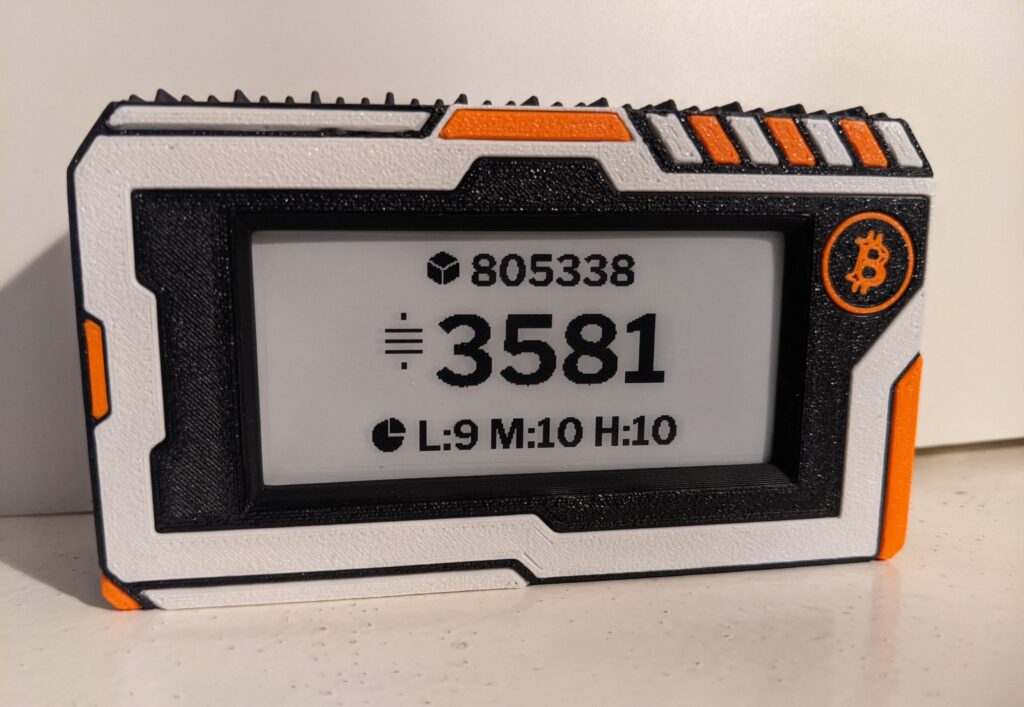
An open source bitcoin timepiece for everyone
created by bitcoiners for bitcoiners
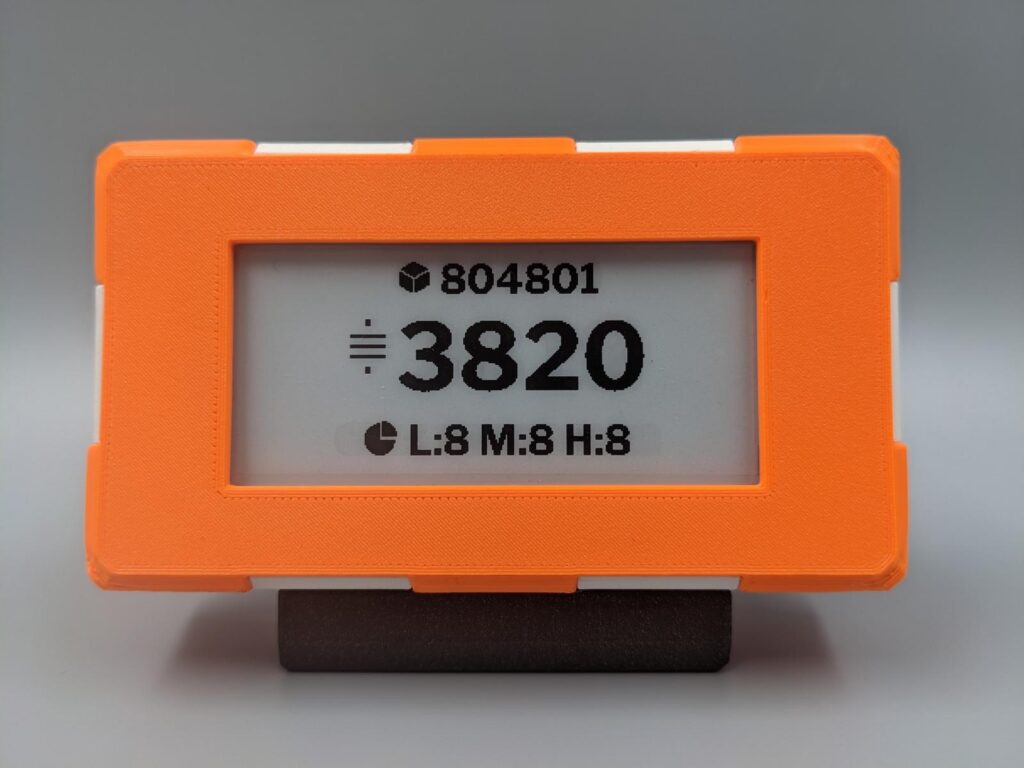
What Makes Up an OrangeClock?
- Raspberry Pi Pico WH (Wireless w/ Headers already installed)
- Waveshare 2.9 inch eInk/ePaper Display Module for Raspberry Pi Pico (296 x 128 pixels)
Follow this link to the correct display. It must have “Pico” in the product name. - Enclosure and 4 x m2.5 screws (6mm length) — either purchase an enclosure or print one yourself from these models
OrangeClock Build Instructions
1) Install Micropython firmware (WiFi only version, without Bluetooth support) on Raspberry Pi Pico W
2) Install Thonny
3) Download the OrangeClock code from github
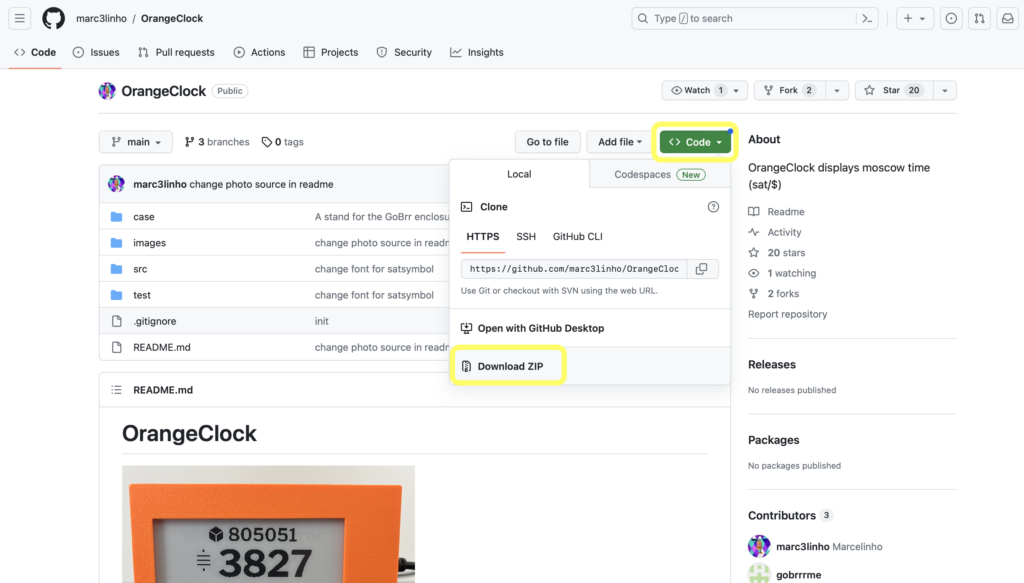
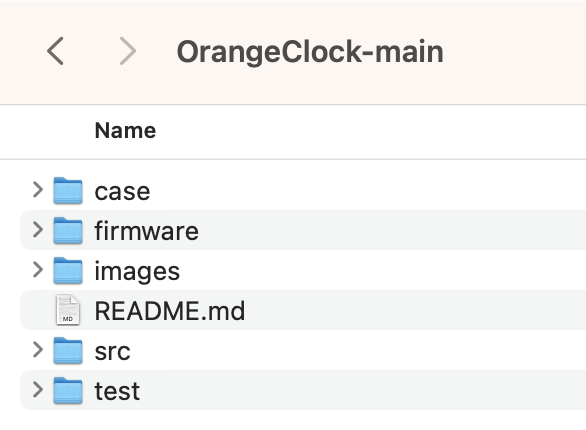
4) Extract the files from the .zip archive
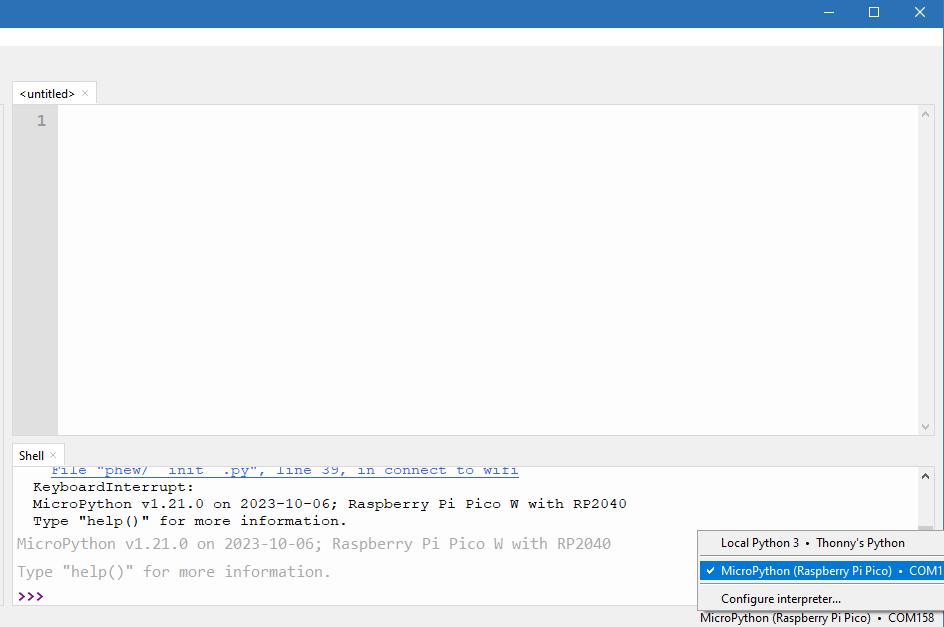
5) Start Thonny and configure the Interpreter:
Tools -> Options -> Interpreter -> Micropython (Raspberry Pi Pico)6) Select your Pico as the target device
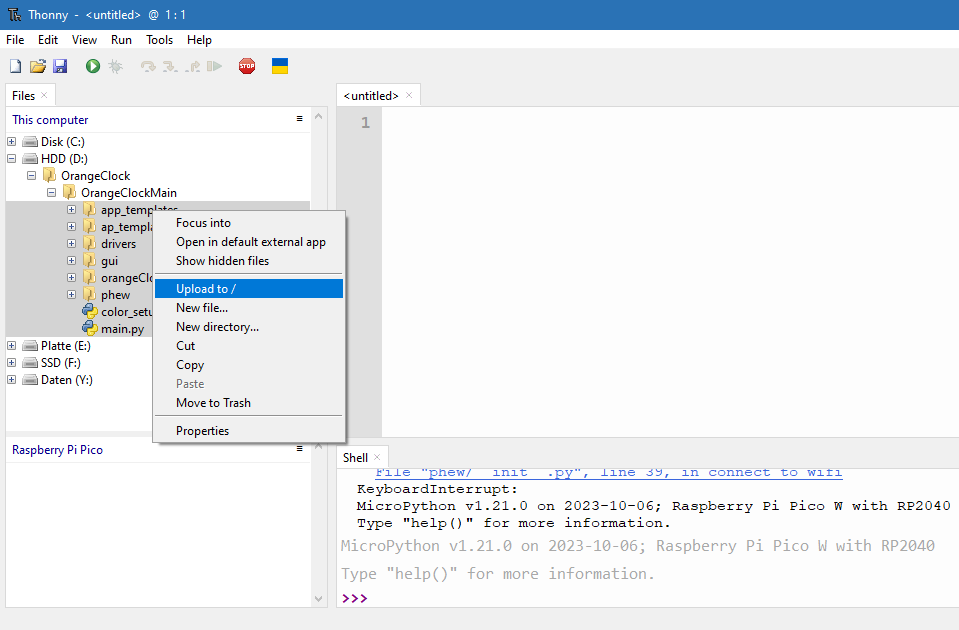
7) Select all of the items in the “src” folder, right click, and select
“Upload to /”
8) Disconnect the hardware and plug it into the USB power source of your choice
After the restart, access the WiFi-Manager with your phone or computer:
SSID= OrangeClockWifi
Open the URL orange.clock in your browser or tap the prompt on your phone.
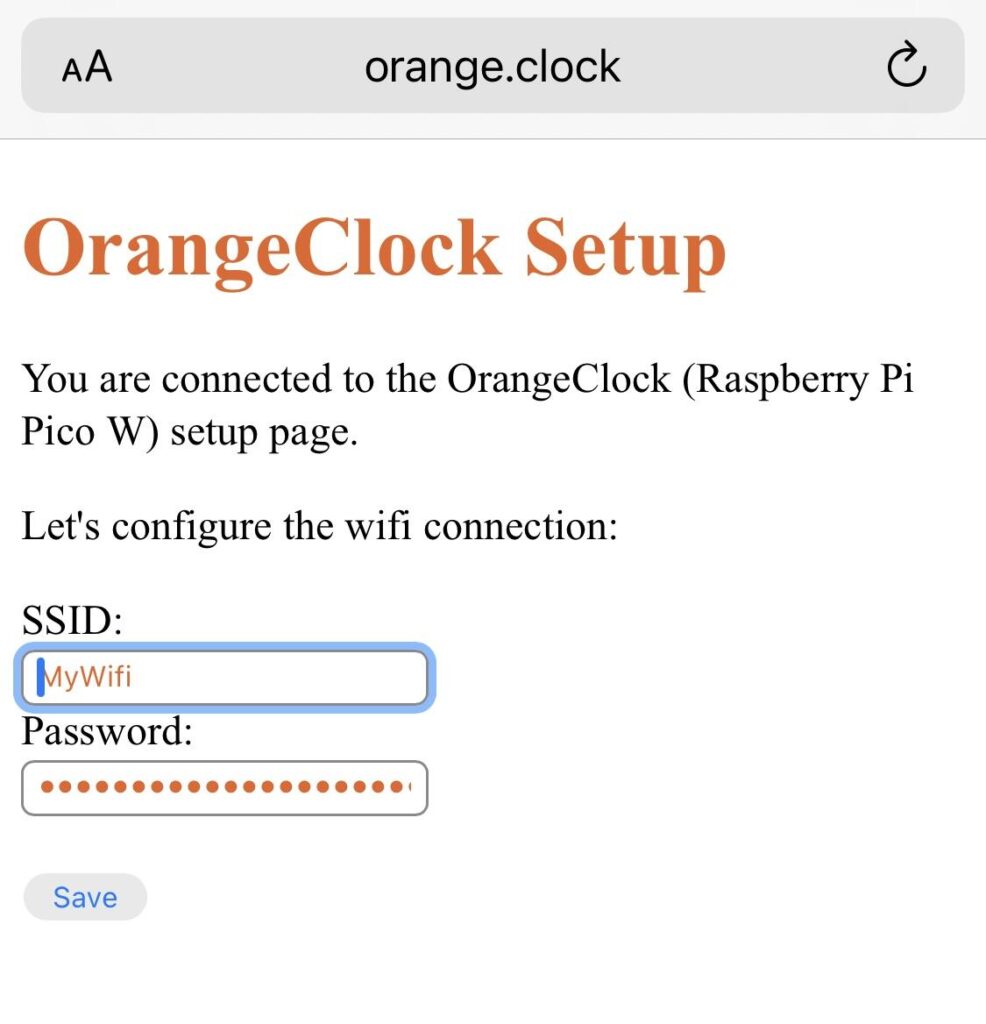
9) Input your Wi-Fi credentials and save them. The OrangeClock will reboot automatically and connect to your network
Note: The Wi-Fi password is stored in plain text on the Pico, so the OrangeClock should be connected to an isolated network or guest network.

10) All done! The entire screen should flicker shortly after connecting to your network
- It will take OrangeClock about 3-5 minutes to initialize and display the UI
- If you see a “Connection Error” don’t panic, give it a few more minutes, it will try to connect and reopen its access point if something went wrong.
Please keep in mind…
The entire screen will flicker every 12 hours when the display performs a full refresh cycle, this is expected behavior
Need help? Join our chat group
Where to buy?
The OrangeClock is available for purchase from the following resellers

Ships to: Worldwide

Ships to: Worldwide